
Setting up a betta fish tank properly gives your fish a safe, comfortable and stable environment from the start. A suitable tank, clean conditioned water, stable temperature, gentle filtration, safe decorations and appropriate lighting all play an important role in betta care.
In this step-by-step guide, I’ll show you how I set up my betta tank, from choosing the right equipment and preparing the water to cycling the aquarium and introducing my fish.
Why Proper Betta Tank Setup Matters?
Wild betta splendens are found in shallow freshwater habitats across parts of Southeast Asia, including areas with vegetation, relatively slow-moving water and changing water conditions.
That’s why tiny bowls or unheated tanks don’t work for them. When their setup isn’t right, bettas can get stressed, sick, lose color, or even die too soon.
You might see issues like fin rot or just a sad, tired-looking fish. But give them a proper home with clean water, the right temperature, and some space to explore. And you’ll see a huge difference. They’ll be active, bright, and even build cute bubble nests. A good setup means a happy, healthy betta that lives much longer.
Process of Setting Up Tank
Your betta hobby journey begins with setting up the perfect tank for your fish. The setup process usually involves three different stages. First, you purchase the tank and its equipment. Second, you set up the tank, and third, you maintain it after it’s set up.
Stage 1
Step 1: Buy a Tank
When setting up a betta tank, the first step is to buy the tank before purchasing the betta fish. Many beginners make the mistake of getting the betta fish before they have the tank, which results in keeping the fish in the container it came in until the setup is complete.
We have a comprehensive guide about the ideal and recommended tank size, which we highly recommend you read before buying a tank.
A tank of around 5 gallons or larger is a practical starting point for a single betta. Larger aquariums can provide more swimming space and greater water volume, which can make temperature and water-quality management easier. Choose a tank with more horizontal swimming space rather than prioritising height.

If you can afford a larger tank, such as a 10-gallon or 20-gallon long tank, its larger surface area can provide your betta with more swimming space and a more natural environment. This is generally preferable to a small, cramped setup.
When purchasing a tank, consider its shape. Avoid vertical or tall tanks with minimal horizontal space, as they can make it exhausting for bettas to reach the surface to breathe. Also, tall tanks result in less horizontal space, affecting the swimming pattern of fish.
Step 2: Choose the Substrate
Substrate is an important part of the tank setup as it imitates the natural environment and creates a space for beneficial bacteria to thrive. It also anchors plant roots, enabling them to grow effectively. While there are several options available, starting with a basic substrate like sand or gravel is recommended.

A thin, even layer of substrate is enough for most betta tanks. If you’re growing rooted plants, you may need a deeper layer depending on the plants and substrate you choose.
Step 3: Place the Heater and Thermometer
Maintaining a warmer temperature is crucial for betta tanks. Choose a reliable aquarium heater that is appropriately sized for your tank. A faulty or poorly sized heater can struggle to maintain a stable temperature, so use a separate thermometer to check the water rather than relying solely on the heater’s setting.
To keep the aquarium temperature in check, use a thermometer and keep it between 78-82°F. It’s quite challenging to maintain a stable temperature in smaller tanks, especially those with less than 5 gallons. This strongly supports our recommendation for larger tanks.
Step 4: Install a Filter
A filter is an important part of a betta fish tank because it helps remove waste and keeps the water cleaner between water changes. Choose a filter that is suitable for your tank size and produces a gentle flow.
Bettas, especially those with long fins, can struggle against strong currents and may spend most of their time hiding or resting if the water movement is too powerful.

Step 5: Set Up the Lighting
Bettas benefit from a consistent day and night cycle, so keep your aquarium lighting on during the day and turn it off at night. You don’t need an overly bright light, especially if your tank has few plants or your betta has plenty of shaded areas to rest.
Floating plants can provide natural cover and help diffuse the light, giving your betta a choice between brighter and shaded areas. Using a timer can also help maintain a consistent lighting schedule and prevent you from accidentally leaving the light on for too long.

Aim for around 8–10 hours of light per day, adjusting the duration based on your plants and algae growth.
Step 6: Add Water Conditioner
A water conditioner is a must-have for any betta tank. It makes tap water safe by removing harmful stuff like chlorine, chloramine and heavy metals that can hurt your fish. Not all conditioners are the same.
Use a water conditioner that treats the disinfectants used in your tap water, including chlorine and chloramine where applicable. Follow the manufacturer’s dosage instructions whenever you add tap water to the aquarium.
Step 7: Test the Water
An aquarium water test kit is an essential part of setting up and maintaining a betta tank. Testing your water helps you monitor the conditions your fish is living in and identify problems before they become serious.
For a cycled aquarium, regularly check these key parameters:
- Ammonia: 0 ppm
- Nitrite: 0 ppm
- Nitrate: Keep at a low, manageable level through regular maintenance and water changes.
- pH: Test regularly and focus on keeping it stable rather than constantly trying to adjust it.
Ammonia and nitrite are particularly important because they can become harmful to fish even when the water looks perfectly clear. During the cycling process, test the water more frequently to track how ammonia and nitrite change as beneficial bacteria become established.
Liquid test kits are generally a useful choice for monitoring aquarium water. Once your tank is established, continue testing periodically and whenever your betta shows unusual behavior or you notice a change in the tank.
Step 8: Select Location for Your Tank
Make sure to pick a good spot for the tank inside your home. The chosen location should allow you to easily do tasks like changing the water, feeding the fish, and cleaning the tank. Choose a stable location away from direct sunlight, draughts, radiators and air-conditioning vents.
The tank must be positioned on a stable, flat surface to prevent it from tipping over. The spot should also have easy access to electrical outlets for devices like the heater, filter and lights. The stand holding the aquarium should also be strong enough to support its weight.
Step 9: Add Plants
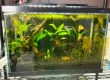
Plants can make a betta tank more comfortable by providing places to explore, hide and rest. They can also help create shaded areas and make the aquarium feel more natural. Choose plants based on your tank’s lighting, available space and how much maintenance you’re comfortable with.
Easy options include Anubias and Java fern, which can be attached to rocks or driftwood rather than planted in the substrate. Amazon frogbit and water sprite can provide useful cover near the water’s surface, while Java moss can add cover around decorations and hardscape.
If you don’t want to maintain live plants, silk plants are a good alternative. Choose soft, aquarium-safe plants without sharp or rough edges that could damage your betta’s delicate fins. Leave enough open space for swimming rather than filling the entire aquarium with plants.
Stage 2
Step 10: Prepare the Tank
Before adding water, make sure your aquarium and equipment are clean and free from harmful residues. Rinse the tank with plain water and never use household soap or detergents, as traces can remain behind and harm your betta. If you need to clean equipment more thoroughly, use a product specifically designed for aquarium use and follow its instructions carefully.
Next, rinse your substrate thoroughly. Place gravel or sand in a clean bucket and rinse it several times until the water runs mostly clear. This removes dust and debris that could otherwise make the aquarium cloudy. Once clean, add the substrate gently to the bottom of the tank.
Step 11: Decorate Betta Fish Tank
Add your betta fish tank decorations and plants while leaving enough open space for your betta to swim comfortably. Include suitable hiding and resting areas, such as caves, broad-leaved plants or other aquarium-safe features.
Before adding anything to the aquarium, rinse it thoroughly with plain water and check for sharp edges, rough surfaces, loose parts or materials that aren’t suitable for aquarium use. Avoid decorations with openings that could trap your betta.
Arrange the plants and decorations so your betta has a mixture of open swimming areas, cover and places to rest.
Step 12: Fill the tank
Once the substrate, plants and decorations are in place, slowly fill the aquarium with prepared water. If you’re using tap water, add an appropriate water conditioner according to the manufacturer’s instructions to treat chlorine and chloramine.
You can use a clean bucket or an aquarium water changer to fill the tank. If you’re using a bucket, pour the water slowly over a clean plate, bowl or similar surface. This helps prevent the flow from disturbing the substrate or moving your decorations.

Fill the aquarium to the appropriate level, leaving some space at the top. Make sure the tank has a secure lid, as bettas are capable of jumping out of open aquariums. Leave enough space between the water surface and the lid for your betta to access atmospheric air comfortably.
Step 13: Install the Equipment
Now it’s time to add the equipment your betta needs to stay healthy and happy.
- Start with the filter. Place it where the water can move gently as bettas don’t like strong currents. If the filter flow is too strong, you can baffle it later.
- Next, add the heater. If it’s a submersible one, make sure it’s fully underwater. Stick it near the filter for even heat spread.
- Put your thermometer on the opposite side of the tank from the heater. That way, you can check the overall temperature.
- Set the heater to around 78–80°F (that’s about 25.5–26.5°C). Bettas are tropical fish, so warm water is a must.
- Once everything is in place, plug in the filter and let it run. Then plug in the heater but only after it’s fully submerged.
- Wait a few hours, then check the temperature. Make sure everything’s running smoothly. This step helps get the tank stable and cozy before your betta moves in.
Step 14: Cycle Your Aquarium
Cycling is quite influential in creating a healthy and stable environment for your fish. It helps produce beneficial bacteria in the tank filter and substrate. These bacteria decompose harmful ammonia and nitrites from fish waste into less toxic nitrates, which can be eliminated through regular water changes.
It takes a few weeks for this to happen fully in a new tank. That’s why you must cycle your tank before adding your betta. If you skip this step, your fish will be stuck swimming in toxic water, which can make them sick or even shorten their lives.
Step 15: Acclimate and Introduce Your Betta Fish
Once your aquarium is fully set up and the water parameters are suitable, you can introduce your betta. Transport can be stressful for fish, so give your betta some time to adjust to the new temperature and surroundings.
Start by turning off the aquarium light to create a calmer environment. Keep the transport bag or container closed and float it in the aquarium for around 15–20 minutes so the water temperature can gradually adjust to the tank temperature.
After temperature acclimation, open the bag and add a small amount of aquarium water to it. Repeat this a few times over the next 15–20 minutes to help your betta become accustomed to the new water conditions.

For a betta coming from a typical local pet shop, this simple method is generally sufficient. A lengthy drip-acclimation process isn’t always necessary and can keep the fish in transport water for longer than needed.
When you’re ready to release your betta, gently use a fish net or suitable container to transfer the fish into the aquarium. Avoid pouring the transport water into your tank, particularly when you don’t know the quality or condition of the water it came in.
Keep the aquarium lights off for the rest of the day if possible and give your betta time to settle in. It may hide, remain still or explore cautiously at first. This is normal during the initial adjustment period. Avoid feeding immediately if your betta appears stressed, and allow it to become comfortable in its new surroundings.
Stage 3
Once your betta tank is established, regular maintenance helps keep the water clean and the aquarium stable. Your maintenance routine should include water testing, partial water changes, filter care, removing waste and checking your equipment.
Step 16. Perform Regular Water Changes
In a cycled betta aquarium, carry out regular partial water changes to help control nitrate and replace some of the older aquarium water with fresh, conditioned water. The amount and frequency you need will depend on factors such as tank size, filtration, plants, feeding, stocking and water-test results.
As a general starting point, you can perform a 20–25% water change once a week and adjust your routine based on your aquarium’s test results and maintenance needs. If nitrate levels are rising too quickly or your tank has a higher bioload, you may need to change water more frequently.
Always treat new tap water with an appropriate water conditioner and try to keep its temperature reasonably close to the aquarium temperature. Avoid replacing all of the water at once unless there is a specific reason to do so, as large changes can cause unnecessary fluctuations in water conditions.
Test your water regularly, particularly if the aquarium is new, your betta’s behavior changes, or you notice problems with water quality. If ammonia or nitrite is detected in an established tank, investigate the cause and take appropriate action rather than relying on a fixed maintenance schedule.
Step 17. Feeding Your Betta
Feed your betta a high-quality, protein-rich diet made specifically for bettas. Offer small portions once or twice a day, giving only what your fish can eat without leaving excess food behind.
You can occasionally add suitable frozen or live foods for variety. Avoid overfeeding, as uneaten food can pollute the water and affect your Betta’s health. For more guidance, see our complete betta fish feeding guide.
Common Betta Tank Setup Mistakes
Avoid these common mistakes when setting up and maintaining your betta’s aquarium:
- Keeping your betta in an overly small tank.
- Adding your betta before properly cycling the aquarium.
- Using untreated tap water.
- Choosing a filter that creates a strong current.
- Skipping the heater or failing to monitor the water temperature.
- Using sharp or rough decorations that could damage the fins.
- Placing the aquarium in direct sunlight or near heat sources.
- Overcrowding the tank with unsuitable tank mates.
- Overfeeding, which can lead to excess waste and poor water quality.
- Failing to test ammonia, nitrite, nitrate and pH.
- Replacing all the water or filter media unnecessarily.
- Leaving the aquarium uncovered when your betta can jump out.